

 www.extendoffice.com
 Introduction: Building Your Own Row Boat So you're looking to build your own row boat? Fantastic! Building a boat is a rewarding experience, connecting you with the water in a unique way. This guide provides a simplified, step-by-step process for constructing a basic flat-bottom row boat. It's perfect for beginners and requires minimal tools and readily available materials. We'll focus on a small, stable design suitable for calm waters. Remember safety is paramount; always wear appropriate personal protective equipment (PPE) when working with tools and materials.
Materials and Tools Needed: Before you begin, gather the following:
- Lumber: Marine-grade plywood (e.g., 1/4" or 3/8" thickness) for the hull, sides, and transom. Softwood like pine or cedar can also be used if sealed properly.
- Lumber: Dimensional lumber (e.g., 1x4, 1x2) for framing, seats, and gunwales.
- Epoxy Resin and Hardener: For waterproofing and bonding.
- Fiberglass Tape: For reinforcing seams.
- Wood Screws: Stainless steel or coated screws to prevent rust.
- Marine Sealant: To seal any gaps and prevent leaks.
- Sandpaper: Various grits for smoothing surfaces.
- Paint or Varnish: For protecting the wood from the elements.
- Tools: Circular saw, jigsaw, drill, sander, measuring tape, pencil, clamps, safety glasses, dust mask, gloves.
Step 1: Cut the Hull Panels Using your plans (there are many free plans online for flat-bottom rowboats – search "free flat bottom row boat plans"), carefully cut the bottom, side, and transom panels from your plywood sheets. Precision is key here. Double-check your measurements before cutting. A slight error can throw off the entire boat's shape. Label each piece clearly after cutting (e.g., "Bottom Front," "Side Left").
Step 2: Assemble the Hull Begin by attaching the sides to the bottom panel. Apply epoxy resin to the edges of the bottom panel where the sides will connect. Clamp the sides in place and secure them with wood screws. It is often easier to pre-drill the screw holes to prevent splitting the wood. Use fiberglass tape and epoxy to reinforce the seams inside and out. This is crucial for a watertight seal. Let the epoxy cure completely according to the manufacturer's instructions.
Step 3: Install the Transom Attach the transom to the stern (rear) of the boat, using epoxy and screws. Ensure the transom is square and properly aligned. Again, reinforce the seams with fiberglass tape and epoxy. This provides structural integrity and a watertight seal at the back of the boat.
Step 4: Add Framing and Support Install internal frames or ribs to provide additional support and rigidity to the hull. These frames are typically made from dimensional lumber (e.g., 1x4s or 1x2s). Position them evenly along the length of the boat and secure them with epoxy and screws. Reinforce the corners of the frames for added strength.
Step 5: Attach the Gunwales The gunwales (the top edges of the boat sides) provide structural support and a place to grab. Attach the gunwales to the top edges of the sides using epoxy and screws. Consider using multiple layers of thinner wood for the gunwales to create a more durable and aesthetically pleasing finish.
Step 6: Install the Seats Cut and install the seats. The number and placement of the seats will depend on your boat's design. Secure the seats to the frames with epoxy and screws. Ensure the seats are level and comfortable. Consider adding backrests for added comfort.
Step 7: Sanding and Finishing Thoroughly sand the entire boat, inside and out, to create a smooth surface for painting or varnishing. Start with a coarser grit sandpaper and gradually move to finer grits. Remove all dust and debris before applying any finish.
Step 8: Painting or Varnishing Apply multiple coats of marine-grade paint or varnish to protect the wood from the elements. Follow the manufacturer's instructions for application and drying times. Consider using a primer before painting for better adhesion and a more durable finish.
Conclusion: Launching Your Row Boat Congratulations! You've built your own row boat. Before launching, carefully inspect all seams, screws, and seals to ensure they are secure and watertight. Always wear a personal flotation device (PFD) when operating your boat. Start in calm waters and familiarize yourself with the boat's handling. Enjoy your handmade boat and the adventures it brings!
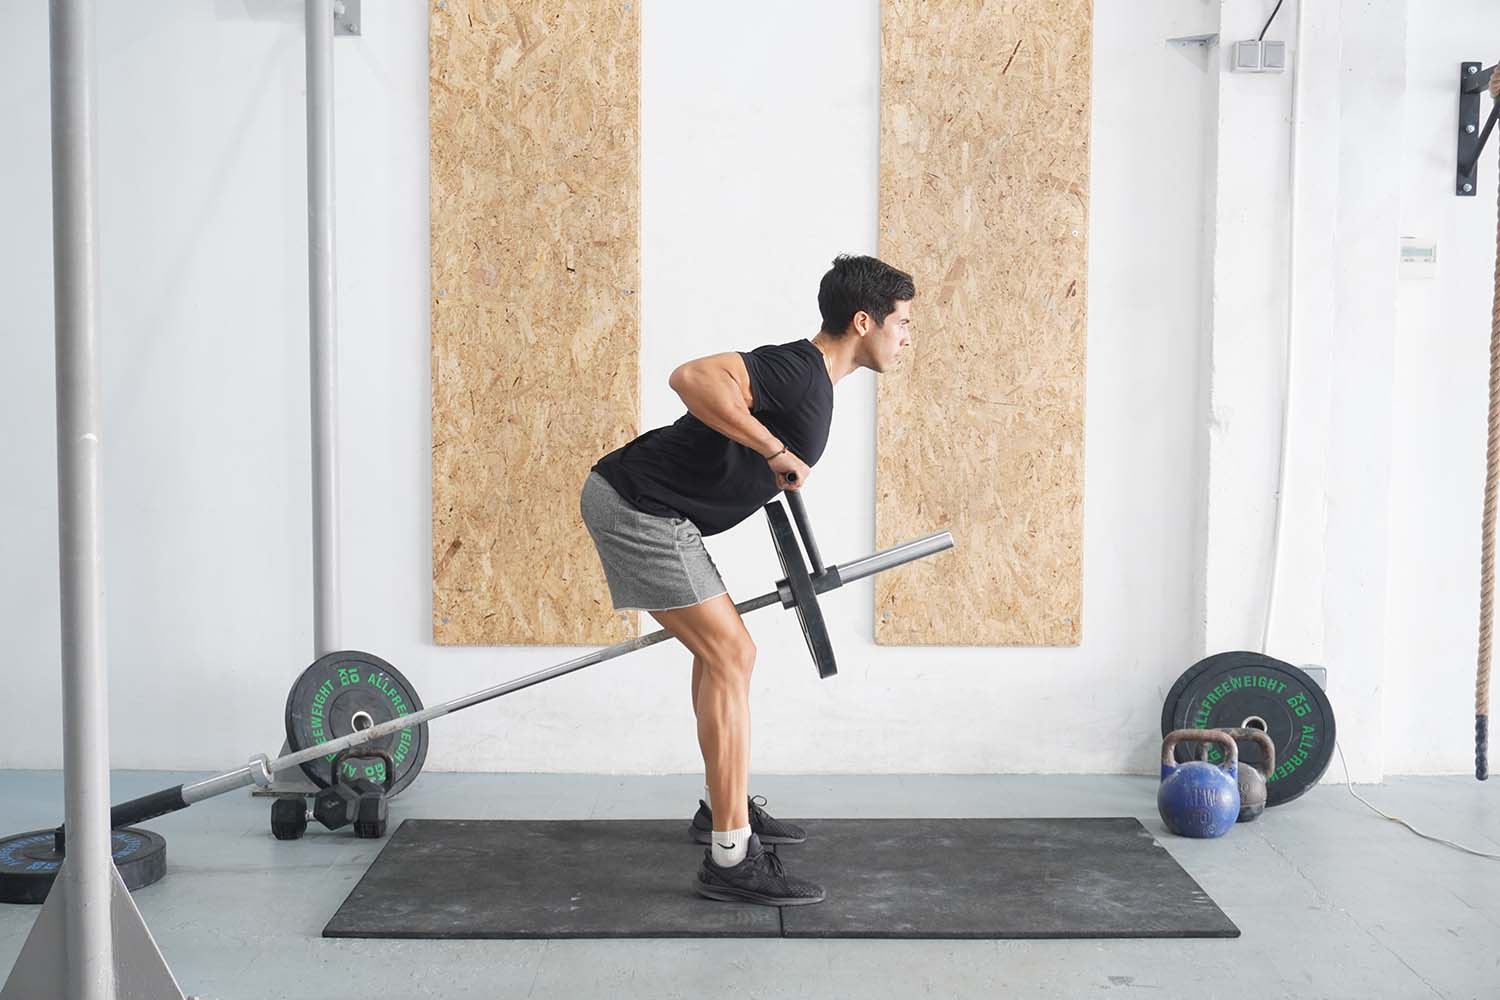
Cable Close Grip Seated Row: Strengthen Your Back & Biceps
 fitnessvolt.com
 Renegade Row
 www.hevyapp.com
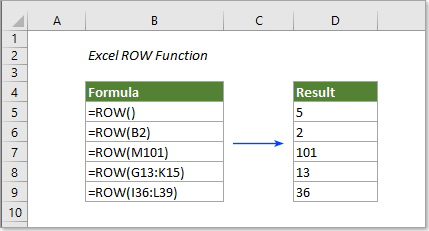
 How To Use The Row Function In Excel?
www.extendoffice.com


0 komentar:
Posting Komentar